Common Apps
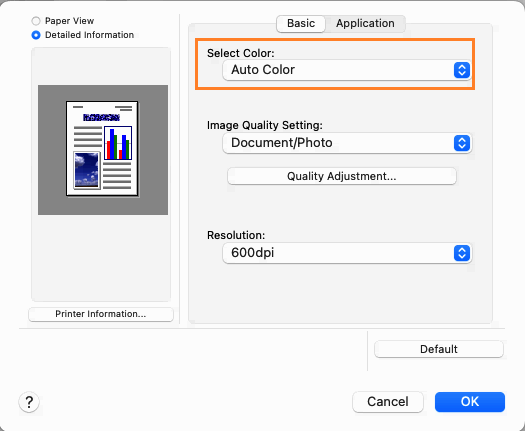
File > Print (or press ⌘ + P) > Printer: SafeQ TU Dublin > Printer Options > Quality > Select Color: Auto Color


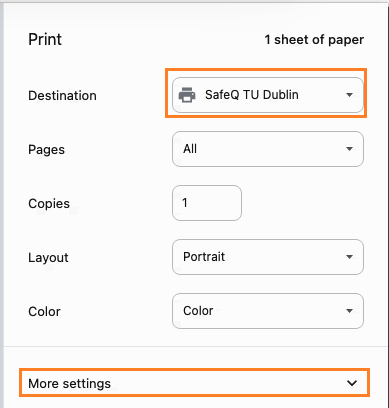
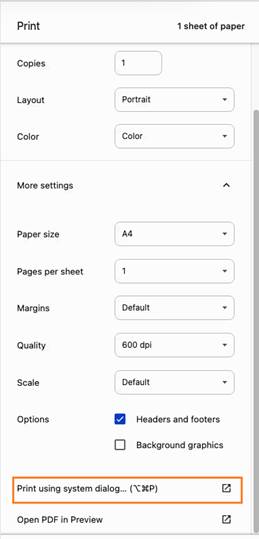
Chrome web browser
File > Print (or press ⌘ + P) > Destination: SafeQ TU Dublin > More settings > Print using system dialog > Printer Options > Quality > Select Color: Auto Color

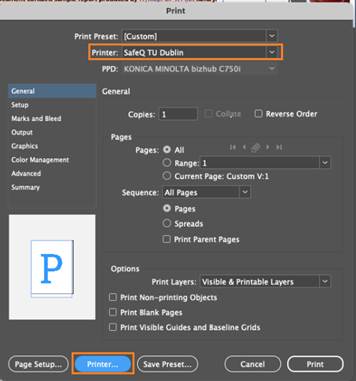
Adobe InDesign
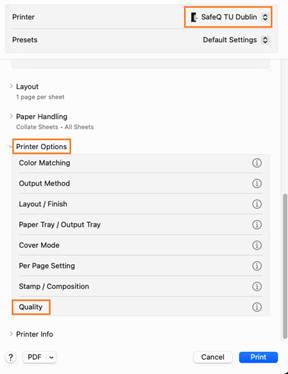
File > Print (or press ⌘ + P) > Printer: SafeQ TU Dublin > Printer… > Printer Options > Quality > Select Color: Auto Color

Creating Printing Preset
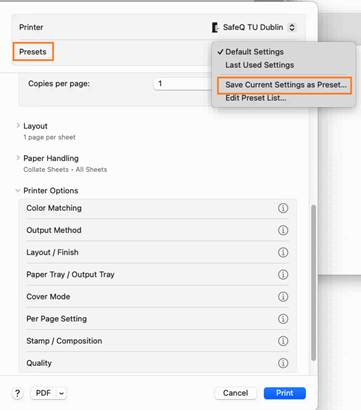
Open some document to print in order to create a preset
File > Print (or press ⌘ + P) > Printer: SafeQ TU Dublin > Printer Options > Make required changes example: Quality > Select Color: Auto Color for 1-Sided print Layout / Finish > Print Type: 1-Sided
Presets > Drop down menu select Save Current Settings as Preset..
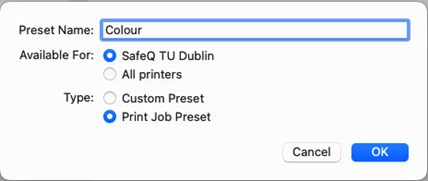
Give Preset some Name: example: Colour > Ok
To Select Preset, File > Print (or press ⌘ + P) > Printer: SafeQ TU Dublin > Presets > Choose required preset
Changing Printer Default Settings
The default SafeQ TU Dublin printer package settings for colour output are set at Gray Scale (B&W).
Below is a bash command that can be run on a Mac to change the default printer setting to Auto Color output.
sudo lpadmin -p SafeQ0 -o SelectColor=Color
sudo killall -HUP cupsd
Run the above commands in Terminal. You may be prompted for your Mac administrator password.

Note: this will make colour printing the default for all print jobs from the Mac unless the user manually changes it at print time
(via File > Print > Printer Options > Quality > Gray Scale).
Was this article helpful?
That’s Great!
Thank you for your feedback
Sorry! We couldn't be helpful
Thank you for your feedback
Feedback sent
We appreciate your effort and will try to fix the article